Adjustable Backrest
This was the final project for my manufacturing and design communication course at UC Berkeley. The project goal was to create a mechanical product with multiple types of fits that attached to something else and increased its capabilities. In this project, I was the CAD and manufacturing leads and I also calculated and compiled the fits and engineering drawings for manufacturing.
Background
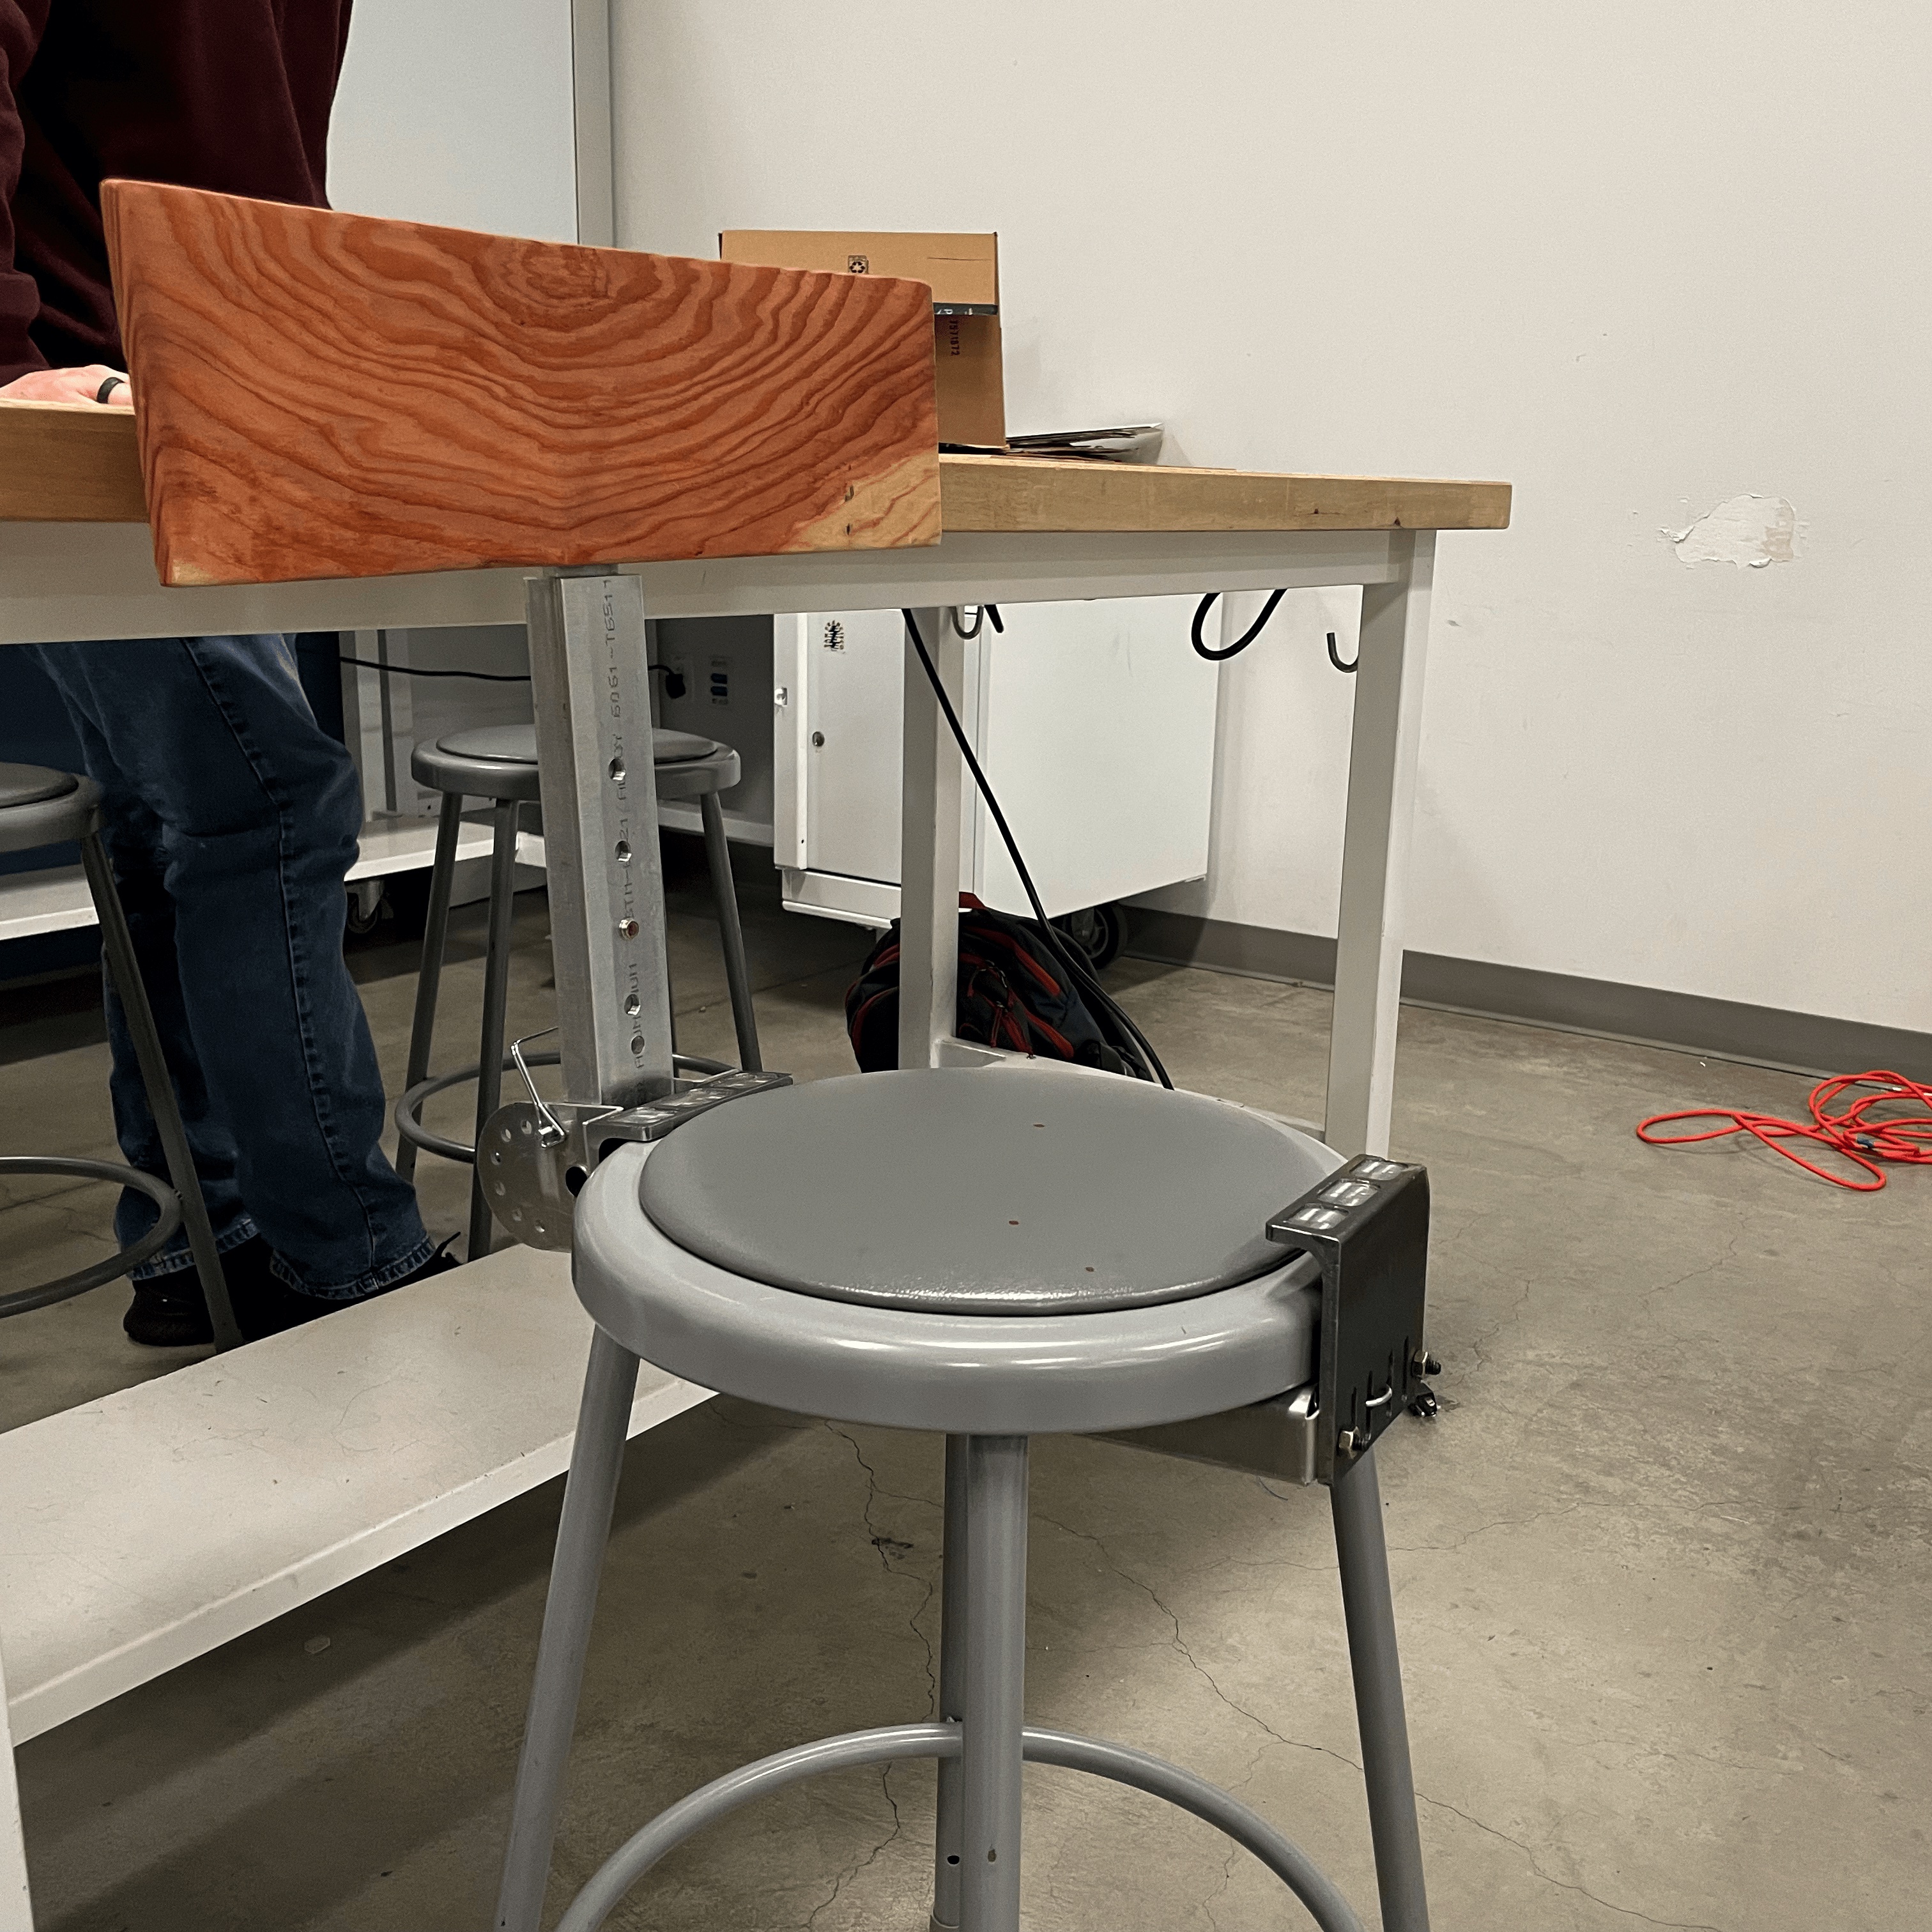
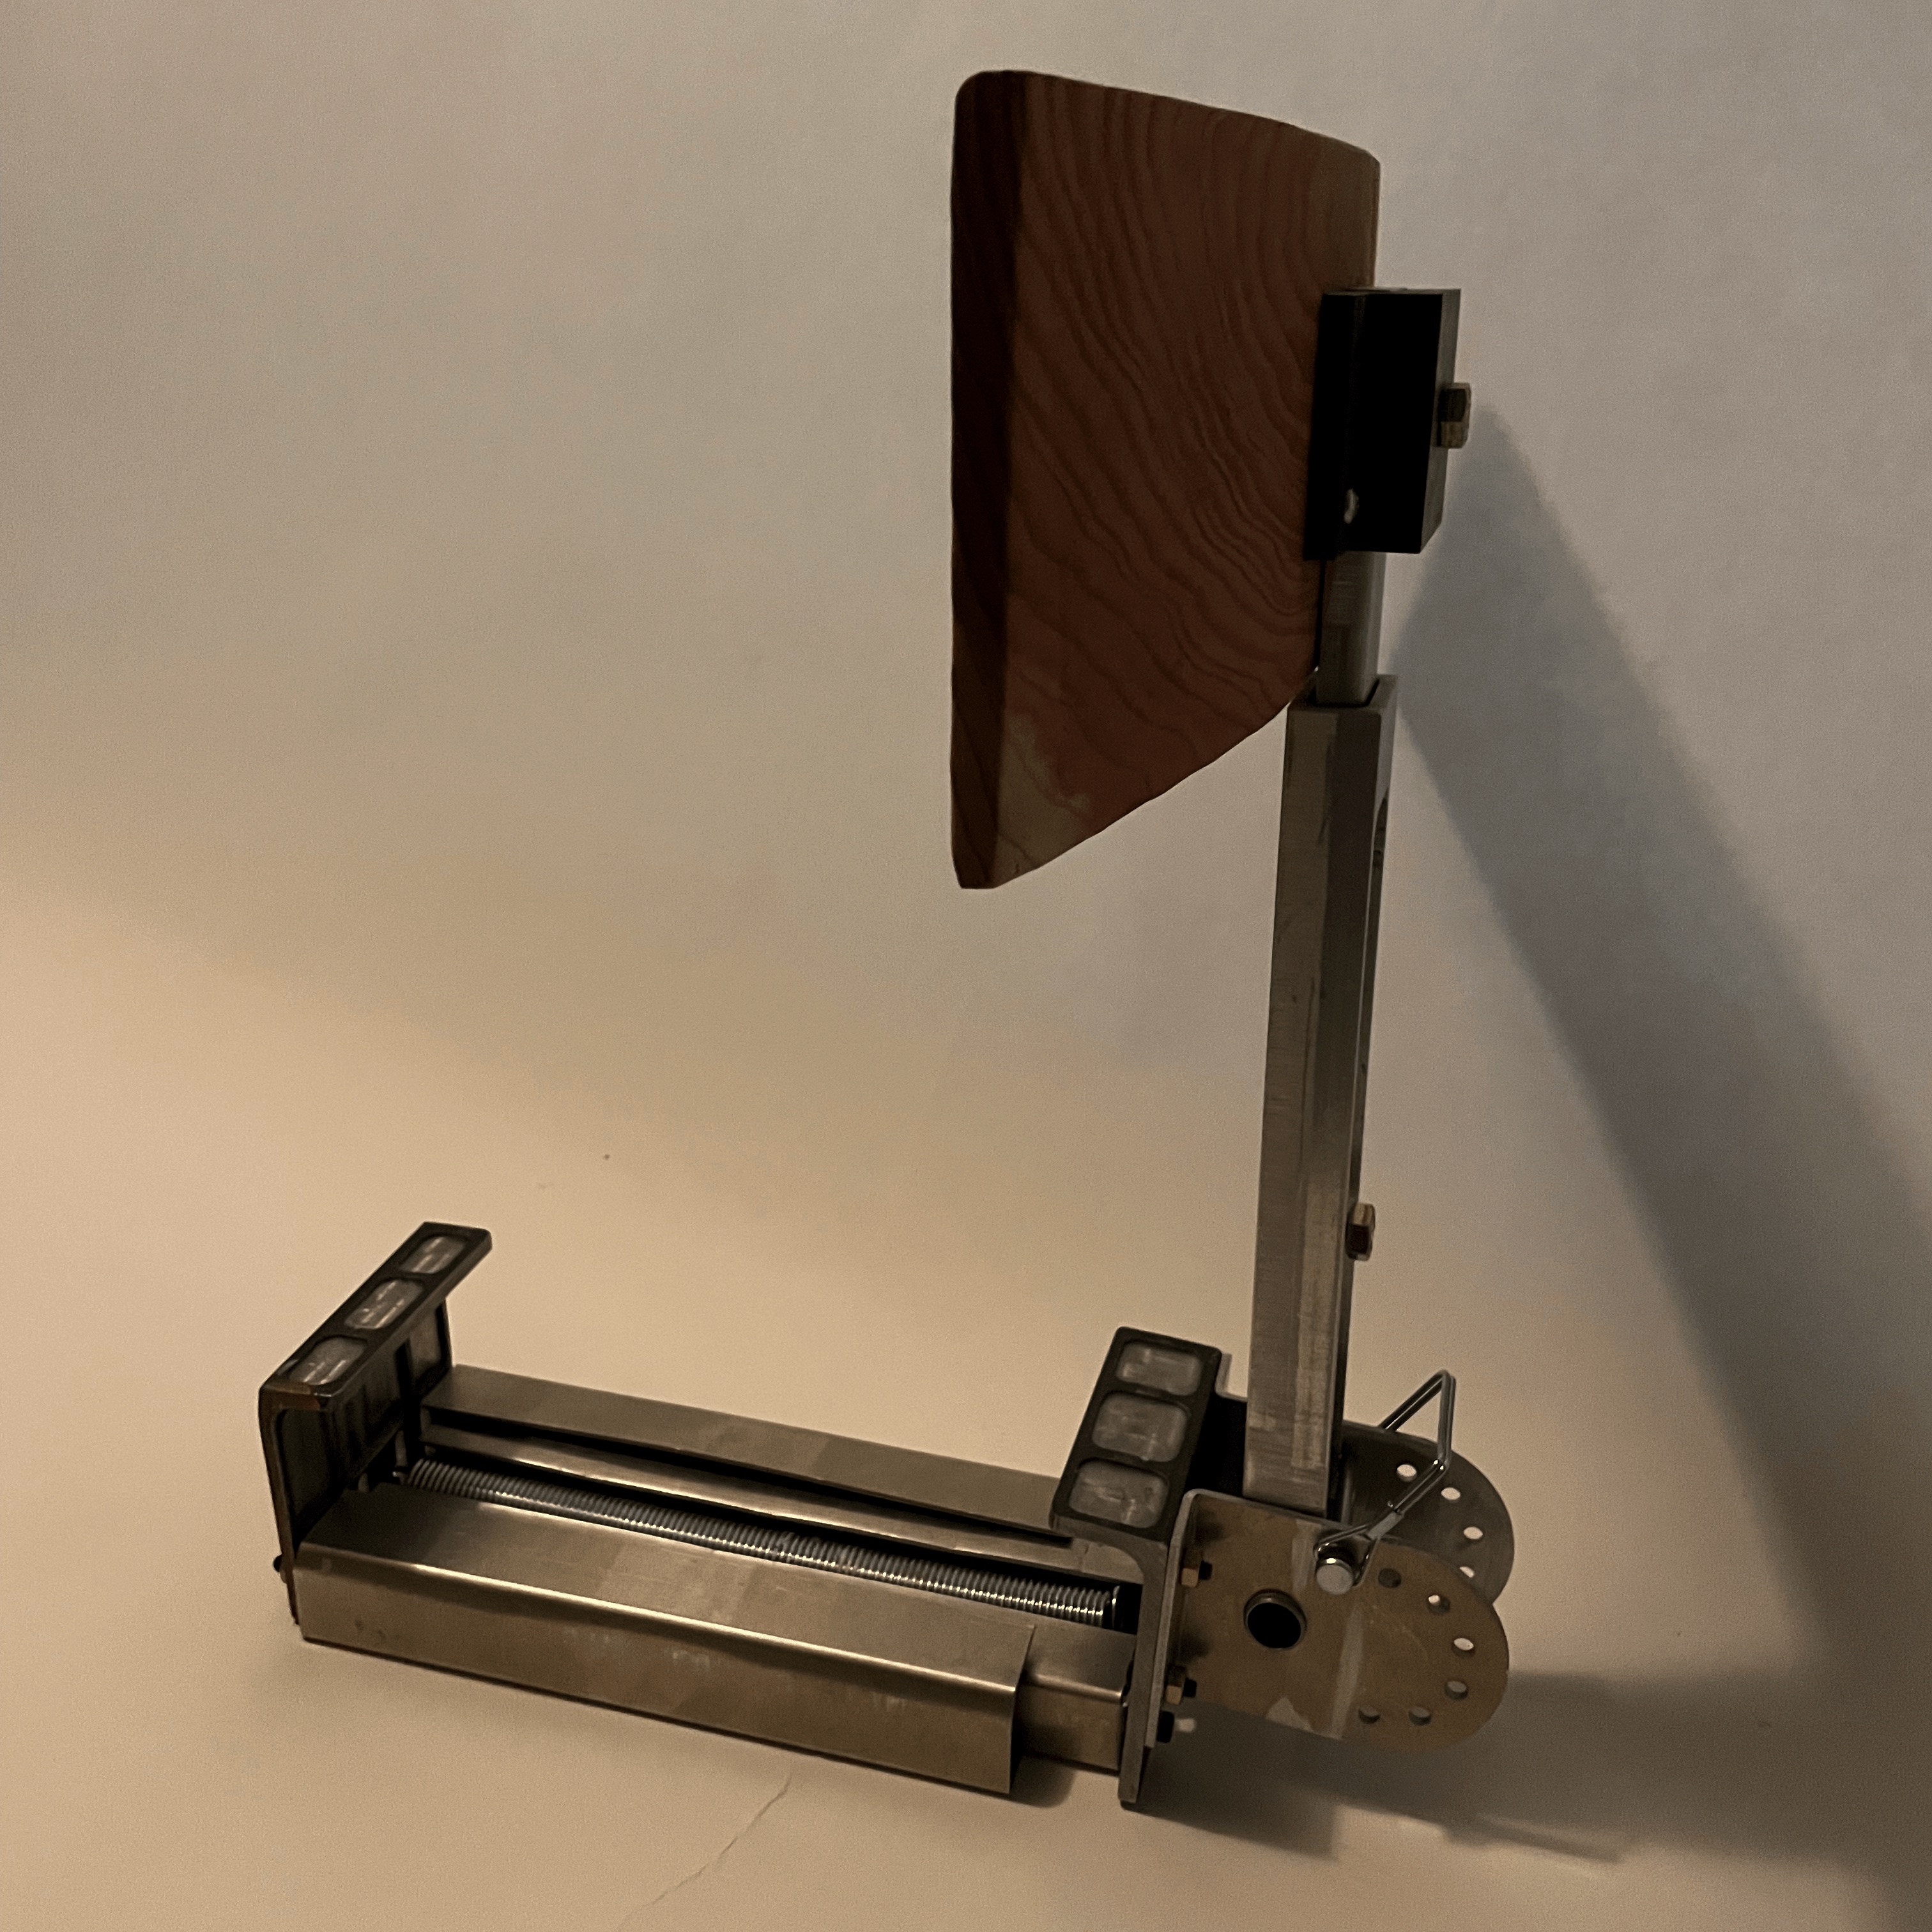
Based on the prompt of building something that attached to something else, my team decided to make an adjustable spring-loaded backrest that could attach to a majority of seats without backrests, primarily the stools in our classroom. We came up with the idea while sitting on these stools, which are notoriously uncomfortable and promote bad posture. We aimed to create an affordable solution, while also focusing on manufacturability and portability, so a potential user (for example, a college student) could fit one in their backpack and bring it to a class. While the class only required our project had 2 different types of fits and 3 individual parts, we did not want to make a simple product, and instead wanted to improve our manufacturing and design skills, leading to us including far more fits and parts.
Design
The design of the backrest was constantly evolving. We started with a brainstorming
session in which each team member came up with 10 ideas. From there, we decided on
the ideas we liked most and combined them, giving us our first complete design choice:
a spring-loaded backrest that would clamp around the base of the stool, with a height
and recline angle adjustable backrest piece.
The designs had to be heavily modified once we started the manufacturing process,
primarily due to the availability of materials. Because this project had to be
self-funded, we were working with a thin budget and had to use scrap metal pieces
that were available in our machine shop. This led to a redesign of the angle adjustment
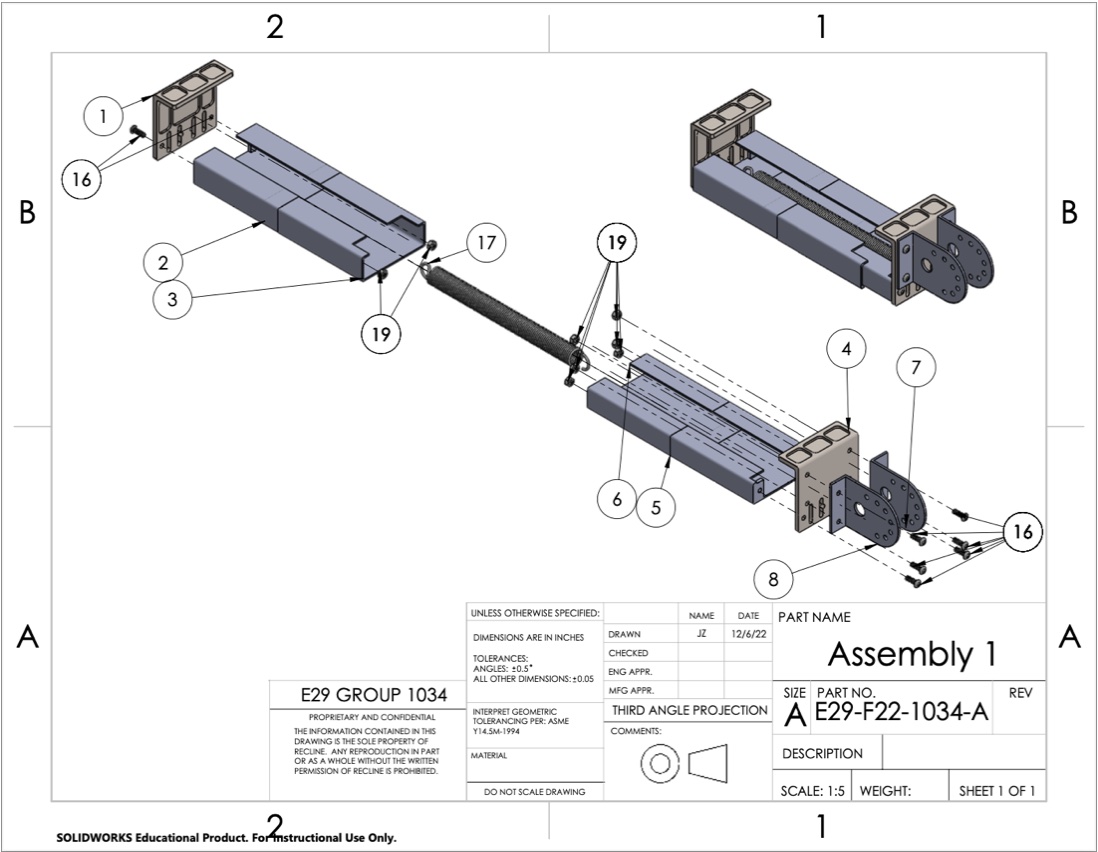
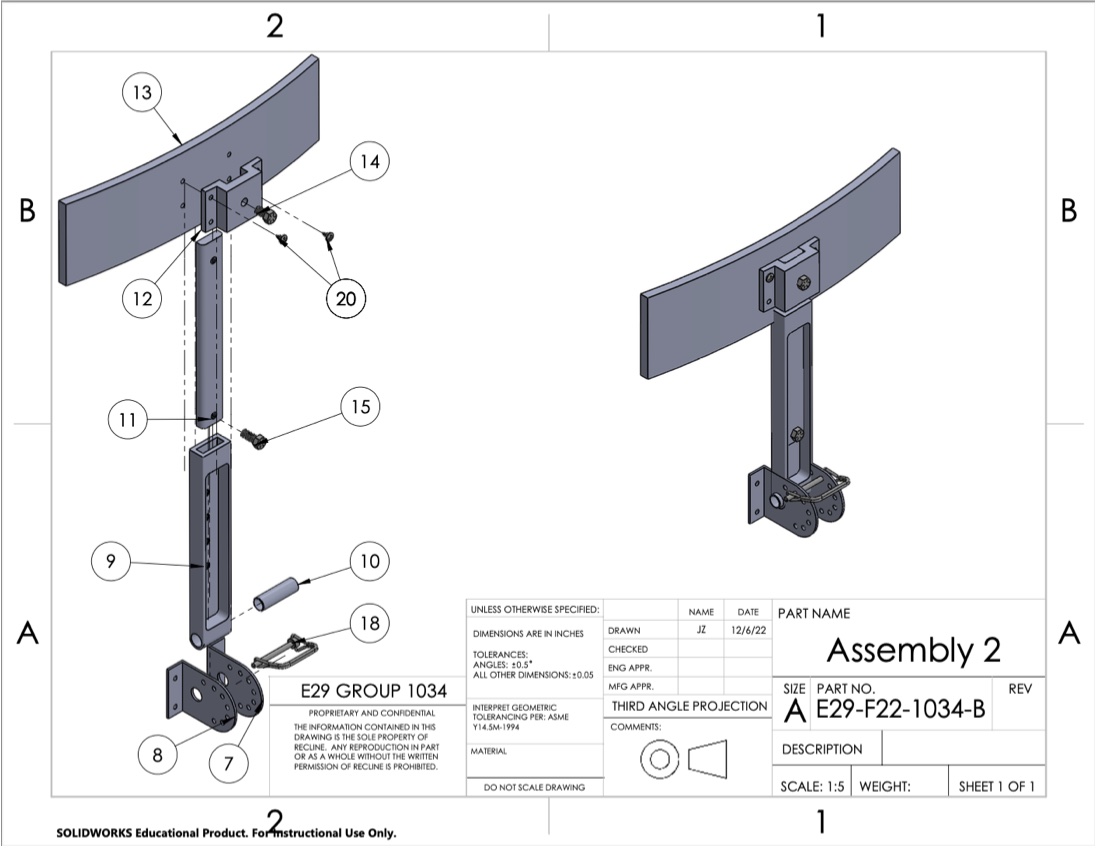
pieces (parts 7, 8, and 10 in the project report) as well as the entire vertical
adjustment mechanism (parts 9 and 11).
Manufacturing
As the lead for manufacturing, I spent approximately 30 hours in the machine shop
over the course of 2.5 weeks to bring our idea to reality. Specifically, I milled
holes in our steel end brackets (parts 1 and 4), water jet and bent the sheet metal
for our angle adjustment parts (7 and 8), turned part 10 on a lathe, and milled out
all of the details on parts 9 and 11. On top of these, I used a bandsaw, drill press,
belt sander, grinder, drop-saw, manual arbor press, electric drill, and multiple
files to bring all of the pieces to their correct dimensions and fits. I also used
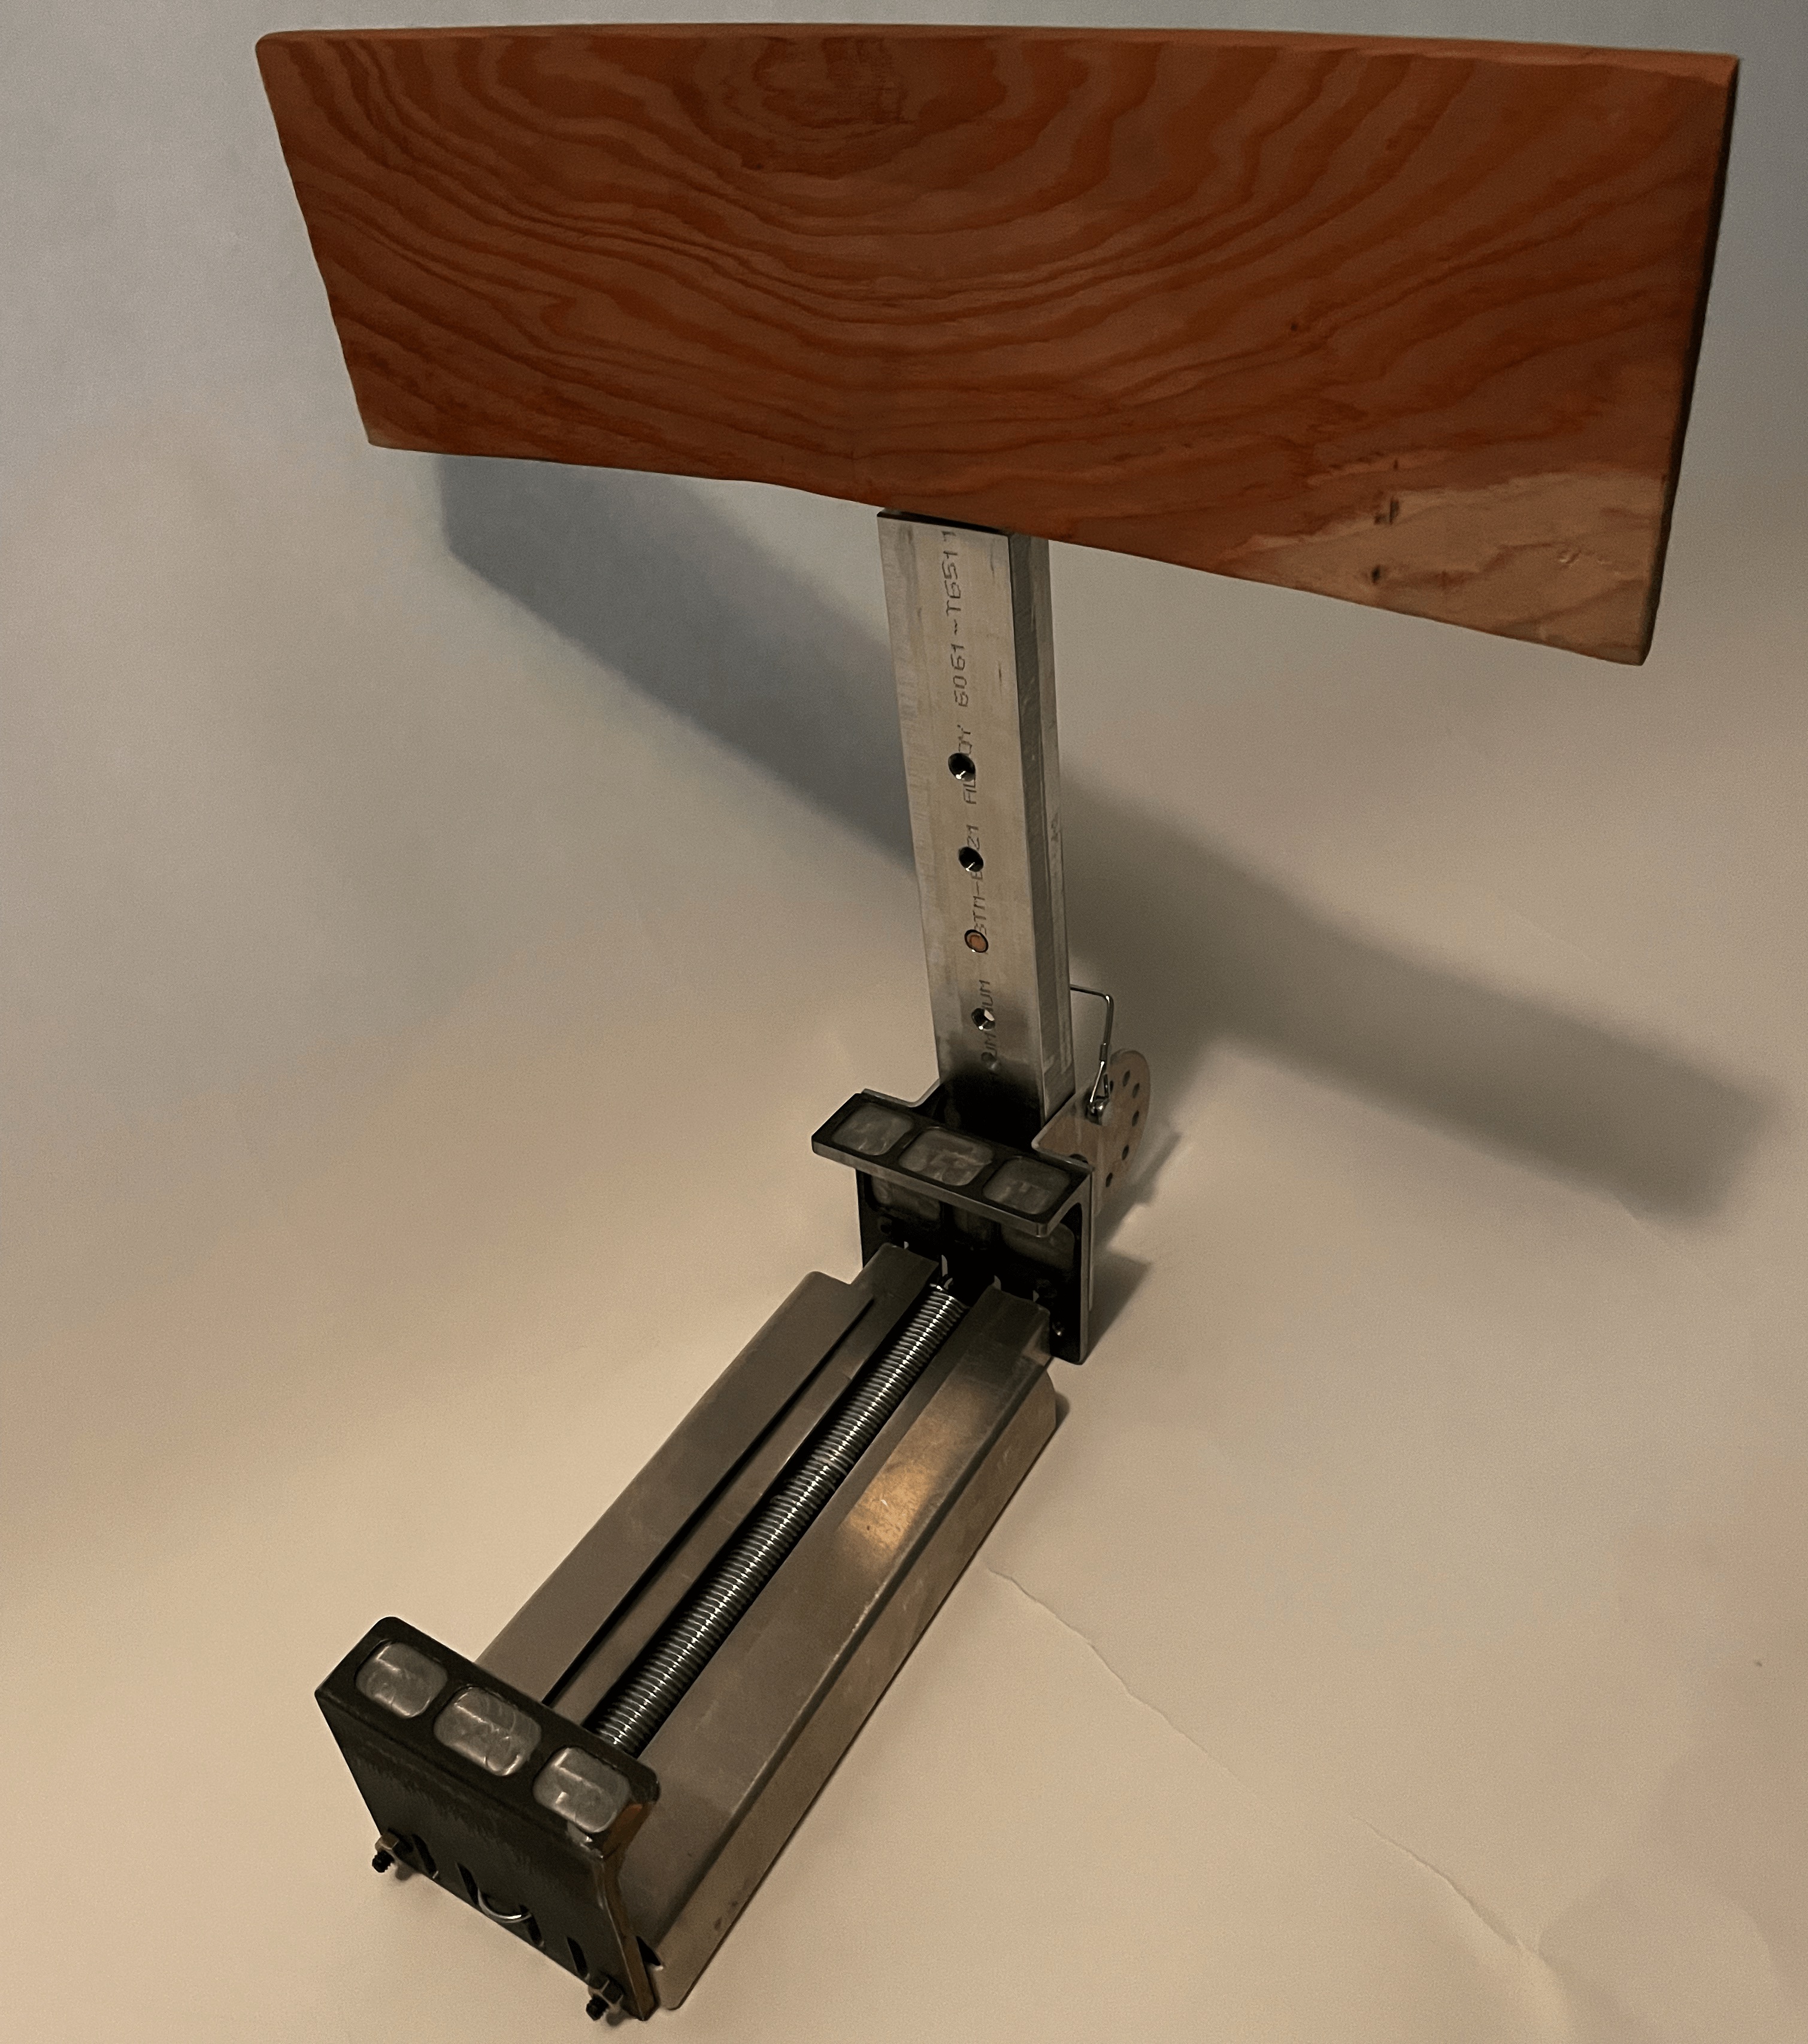
my personal 3D printer to print parts 2, 3, 5, and 6 out of PETG.
Unfortunately, due to a spring force calculation error, our initial prototype
was too strong and snapped the spring housings (parts 2, 3, 5, and 6). We knew we
had to downgrade to a single spring from the two we had planned for, but with only
two days before the project was due, there was not enough time to 3D print the
housings again. I went to the machine shop and was lucky to find a large piece of
scrap sheet metal. I quickly CADed some designs, then water jet out two pieces. I
used a brake to bend the water jet pieces into telescoping housings. Because of the
angle the brake was capable of bending to, I was not able to make two 90º bends on
each side of each housing. Instead, the top bend on each side only made it to
approximately 60º. This would not suffice, and with one day left on the project,
I had to get creative. I tightened a housing piece onto a mill and, using a piece
of scrap wood and the hydraulic vertical motion of the mill head, pressed the final
bend down to the 90º required. I was able to successfully complete this maneuver on b
oth housings and they completed the assembly of our prototype.
Reflection
I learned a lot from this project, not only about designing for manufacturing and engineering drawings as was the topic of the course, but about the realistic processes of machining. I spent so much time in the machine shop that I got a solid grip on when and how to use the machines available. It gave me a new respect for machining, and has given me vital experience for building in the future.